Table of contents
- Introduction
- Installation and removal
- File extension descriptions
- Viewing file type associations
- Finding a program associated with an extension
- Opening registry key for an extension
- Bookmarking file extensions in Registry Editor
- Viewing information about extension on the Internet
- Finding files of certain type
- Changing extensions of files
- File processing framework
- Copying file mask
- Wiping out
- Getting further help
- Version history
- Disclaimer
1. Introduction
File Extensions Shell is the file type associations viewer, file finder, mass file extension changer, and file processing framework.
2. Installation and removal
Administrative rights are required to perform installation and removal.
Uninstalling previous version is not necessary but recommended in order to remove registry entries that might have become obsolete in new version.
Automatic Installation
Use the provided installer to install and remove the product. Uninstallation preserves the existing extension descriptions.
Manual Installation
Copy the product's file to desired location and register it with the regsvr32 utility:
regsvr32 filext.dllTo uninstall the product, run regsvr32 with the -u option:
regsvr32 -u filext.dllthen delete the file. You may need to logoff prior to deleting as the shell extension modules are usually locked by shell.
3. File extension descriptions
File extension description is a regular file which conveys information about a certain type of file. An extension description file has extension .filext (not shown in Windows Explorer), and its name matches the extension of represented file type. For example, the extension description file txt.filext represents the .txt type of files.The name of a *.filext file may contain a dot; in such case the dot and the text after it is ignored and the text before dot is considered to be the extension name. For example, the file named txt.this describes the text files.filext behaves identically to a file named txt.filext.
This allows to give more descriptive names to the *.filext files. This is particularly useful when using the file processing framework.
Creating file extension descriptions
Use one of the following methods:
- From the menu , click , then type in the desired extension.
- Select and right-click files having the desired extensions, then click . The extension descriptions files will be created in the folder containing the selected files.
- Drag files having the desired extensions with the right mouse button and drop them onto a folder where you wish to create the descriptions for the extensions of the dragged files. Then from the context menu click . The extension description files will be created in the folder the dragged files are dropped onto.
4. Viewing file type associations
You need to create an extension description in order to view associations for an extension. See File extension descriptions for how to create one. The information about the extension's associations is reported via the custom columns in detailed view of Windows Explorer, as well as via the tool tips and Details pane (pic. 1). The information consists of:- Friendly type name for the extension (e.g. "Text document" for ".txt" files)
- Friendly name of associated program (e.g. "Notepad")
- Full path to the executable file of associated program (e.g. "C:\Windows\notepad.exe")
- Command used to open files having the extension (e.g. "C:\Windows\notepad.exe %1")
To display the custom columns, from the menu click and check the following columns:
- .Type name
- .Application
- .Executable
- .Command line
The names of the columns start with a dot, providing mnemonic connection with file extensions.
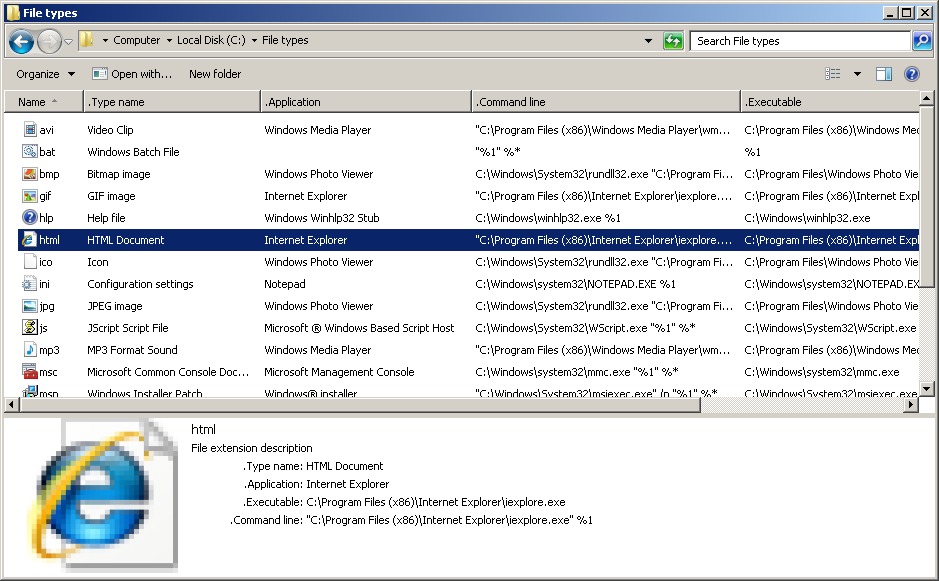 |
| Pic. 1. File type associations view |
5. Finding a program associated with an extension
Right-click an extension description file and from the context menu click . A new Explorer window will open showing the executable file used to open files having the selected extension.You can also start the associated program by clicking .
6. Opening registry key for an extension
Right-click an extension description file, then expand and click or to start registry editor opened at the respective key.7. Bookmarking file extensions in Registry Editor
File extensions can be bookmarked in Registry Editor. Click from the context menu of the file extension description files, then open Registry Editor to navigate between the file extension keys without having to open separate Registry Editor window for each extension.
In addition to the extension's key the key of the extension's class is bookmarked, if exists.
The bookmarks are stored in the following registry key:
HKEY_CURRENT_USER\SOFTWARE\Microsoft\Windows\CurrentVersion\Applets\Regedit\Favorites
Note This operation deletes existing bookmarks.
8. Viewing information about extension on the Internet
Viewing information about extension in a web browser
Right-click an extension description file, then expand and select one of the listed web sites to query for the information about the extension.
Viewing information about extension in a preview pane of Windows Explorer*
Select an extension description file to query a web site and display its response in a preview pane. The web site to query is marked with bullet point in menu. To change the web site click the corresponding menu item while holding <Ctrl> key. To switch the function on/off click item.
*Requires Windows Vista or later
9. Finding files of certain type
Note: this feature is supported only on Windows Vista and later systems.To search a folder for files having specific extensions, select and right-click example files (see below), then from the context menu click (pic. 2).
A separate Windows Explorer window will open showing the files found in the current folder.
To search a folder other than current, drag example files with the right mouse button and drop them on the folder which you want to search, then from the context menu click (pic. 3).
Example files
An example file can be an extension description file (*.filext) or any file having extension:
- If an example file is an extension description file then the folder is searched for files having extensions described by the extension description file.
- Otherwise, the folder is searched for files having the same extension as an example file.
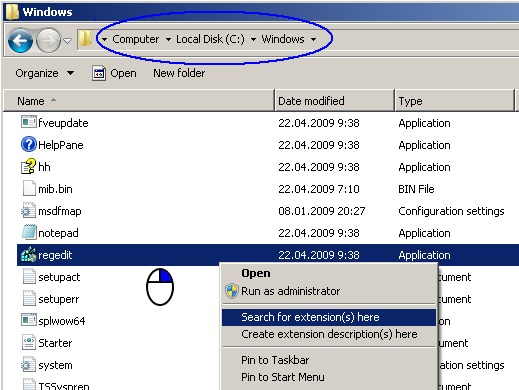 |
| Pic. 2. Searching for *.exe in C:\Windows |
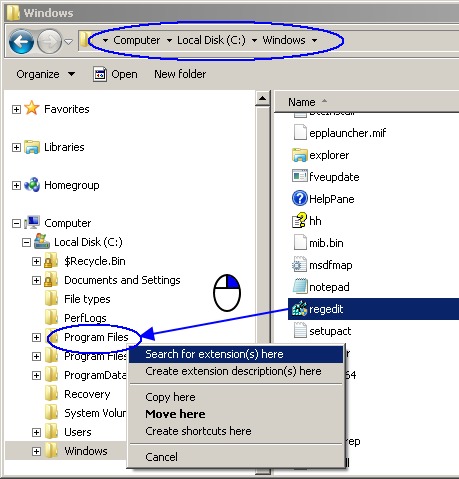 |
| Pic. 3. Searching for *.exe in C:\Program Files |
10. Changing extensions of files
Select the files for which you want to change extensions, and drag-and-drop (or copy-and-paste) them onto a file extension description file, which describes the desired new extension for the selected files. The selected files will be renamed to have the chosen extension.If renaming would result in overwriting existing files, then such files are not renamed.
11. File processing framework
Processing a file creates a copy of the file which differs from the original in some way; alternatively, the file is altered in place without creating a copy. You initiate processing by dragging and dropping a file to an extension description file (*.filext) which contains a script that does the processing.
Script example
The example presents the script which converts graphics files from one format to another (BMP in this case) using the convert tool from ImageMagick graphics processing package.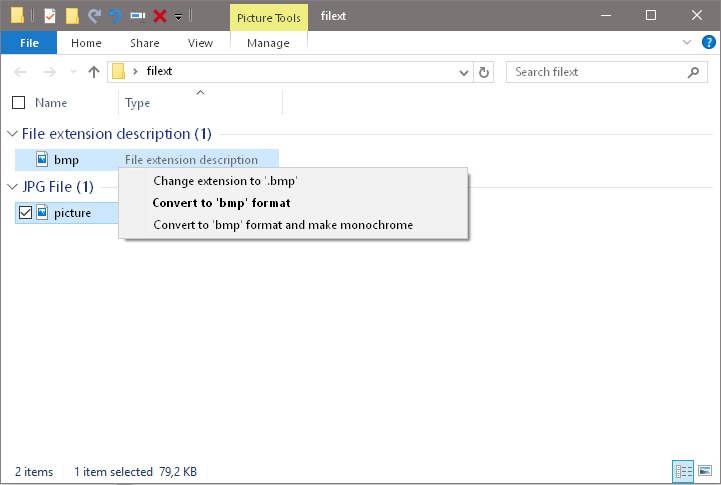 |
| Pic. 4. Menu shown after a picture file is dropped onto a "bmp.filext" file |
Script format
The script for the menu shown on the screenshot is reproduced below. To try it copy and paste it into a file named bmp.filext. The file must be saved in UTF-8 encoding. You may need to adjust the path to convert.exe.[Convert]
Default=1
Text=Convert to '<TargetExt>' format
Command="C:\Program Files\ImageMagick\convert.exe" "<SrcPath>" "<SrcDrive><SrcDir><SrcName>.<TargetExt>"
[ConvertBW]
Default=0
Text=Convert to '<TargetExt>' format and make monochrome
Command="C:\Program Files\ImageMagick\convert.exe" -monochrome "<SrcPath>" "<SrcDrive><SrcDir><SrcName>.<TargetExt>"
The script defines two menu items: one to convert an image to another format (determined by the output file's extension) and the other to convert an image and additionally make it monochrome. The first menu item is the default which means that its command executes when a file is dragged with the left mouse button.
Each section of INI file corresponds to a menu item of a drag-and-drop menu. The structure of a section is described below:
| [Section name] | Can be any text. |
| Default | Specifies if the menu item is default (= 1) or non-default (= 0). The default command is executed when a file is dragged with the left mouse button. |
| Text | A text that appears on the menu item. |
| Command | A command that is executed when the menu item is clicked. |
The Text and the Command parameters can use macros which expand to the path of a dropped file and to the parts of that path. The macros are denoted with the angle brackets. The list of the supported macros follows:
| Macro name | Description | Example |
| <SrcPath> | Full path to the dropped file | C:\some\dir\picture.jpeg |
| <SrcDrive> | The drive of the dropped file | C:\ |
| <SrcDir> | The directory path, excluding the drive part, from where the dropped file was dragged | some\dir\ |
| <SrcName> | The name of the dropped file, without extension | picture |
| <SrcExt> | The extension of the dropped file, without dot | jpeg |
| <TargetExt> | The name of the *.filext file before the first dot | bmp |
| <TargetDescr> | The part between name and extension of a *.filext file (if any) | 48x48 (see example below) |
The Text parameter can only use the <TargetExt> and <TargetDescr> macros. The Command parameter can use any one of the described macros. In this example, because the converted file is dropped onto a bmp.filext file, <TargetExt> becomes "bmp".
The Command parameter can also use the operating system environment variables (denoted with leading and trailing percent character).
Note that the "<SrcPath>" is equivalent to the "<SrcDrive><SrcDir><SrcName>.<SrcExt>".
Instead of using <TargetExt> macro one could simply write "bmp"; however, because the target extension is not specified explicitly, the script can be copied without changes to other *.filext files, for example "png.filext" or "gif.filext", making those files convertors to the respective formats.
The <TargetDescr> macro utilizes a descriptive name feature.
The following example shows the use of a <TargetDescr> macro.
[ConvertResize]
Default=1
Text=Convert to '<TargetExt>' format and resize to <TargetDescr>
Command="C:\Program Files\ImageMagick\convert.exe" -resize <TargetDescr> "<SrcPath>" "<SrcDrive><SrcDir><SrcName>_<TargetDescr>.<TargetExt>"
Assuming that the script above is placed into a bmp.48x48.filext file, it converts a dragged file to BMP format and resizes it to be of 48x48 pixels size. The output file will have "48x48" suffix appended to its name.
12. Copying file mask
The command from the context menu of a file extension description copies to clipboard a mask which specifies the files having the extension. For example, if exe.filext file is selected then the mask *.exe is copied to clipboard.
If more than one extension description file is selected then their masks are separated with semicolon. For example, if exe.filext, bat.filext and cmd.filext files are selected then the text *.exe;*.bat;*.cmd is copied to clipboard.
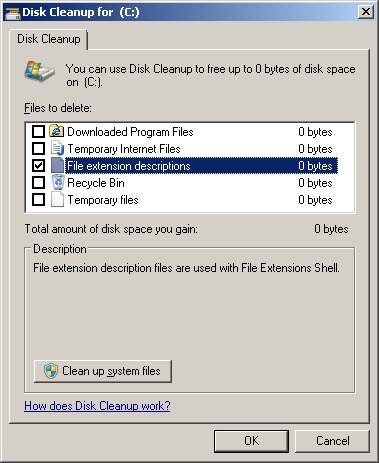
13. Wiping out
File Extensions Shell installs disk cleaner which is accessible through standard Disk Cleanup utility. It allows to delete all extension descriptions on selected drive.
14. Getting further help
You can send questions and feedback by e-mail: support (at) evilapp (dot) com,
You can also subscribe to RSS feed to receive notifications about new product releases.
15. Version history
| version 1.3 released 09-Dec-2017 |
| New |
| File extensions can be bookmarked in Registry Editor. |
| version 1.2 released 19-Jun-2017 |
| New |
| Implemented file processing framework. |
| Added Copy mask command. |
| version 1.1 released 25-Jul-2013 |
| New |
| Display information about file extensions in a preview pane of Windows Explorer |
| version 1.0.1 released 16-Nov-2012 |
| Maintenance release |
| version 1.0 released 07-Jun-2012 |
| First release |
16. Disclaimer
The software is provided "AS IS" without any warranty, either expressed or implied, including, but not limited to, the implied warranties of merchantability and fitness for a particular purpose. The author will not be liable for any special, incidental, consequential or indirect damages due to loss of data or any other reason.